#
Creating the Discord Bot
These docs are for SDLink V2 and older. For SDLink V3 beta, please see the NEW DOCS HERE
In order for this mod to work, you need to create a "Discord Bot" application. Without it, the mod will not work. If you have already used a discord chat mod in the past, you can skip this section
By the end of this guide you should:
- Have a custom discord bot set up
- Have the bot invited to your server
#
Part 1 - Creating the Custom App
To get started, head over to https://discord.com/developers/ and sign in using your discord account. After signing in, you will be taken to the Discord Developer Dashboard. Press the "New Application" button located at the top right of the screen

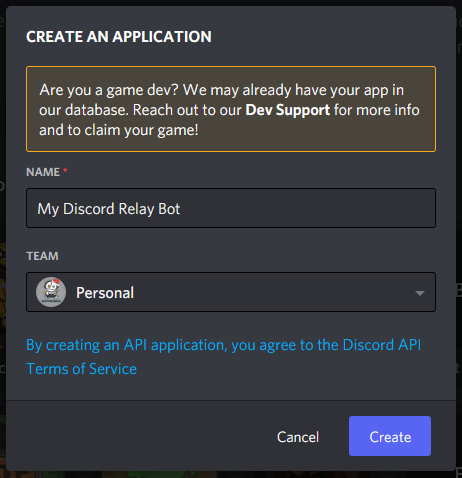
You will get a popup prompting you for a name. Enter the name you'd like your bot to have and click "Create"
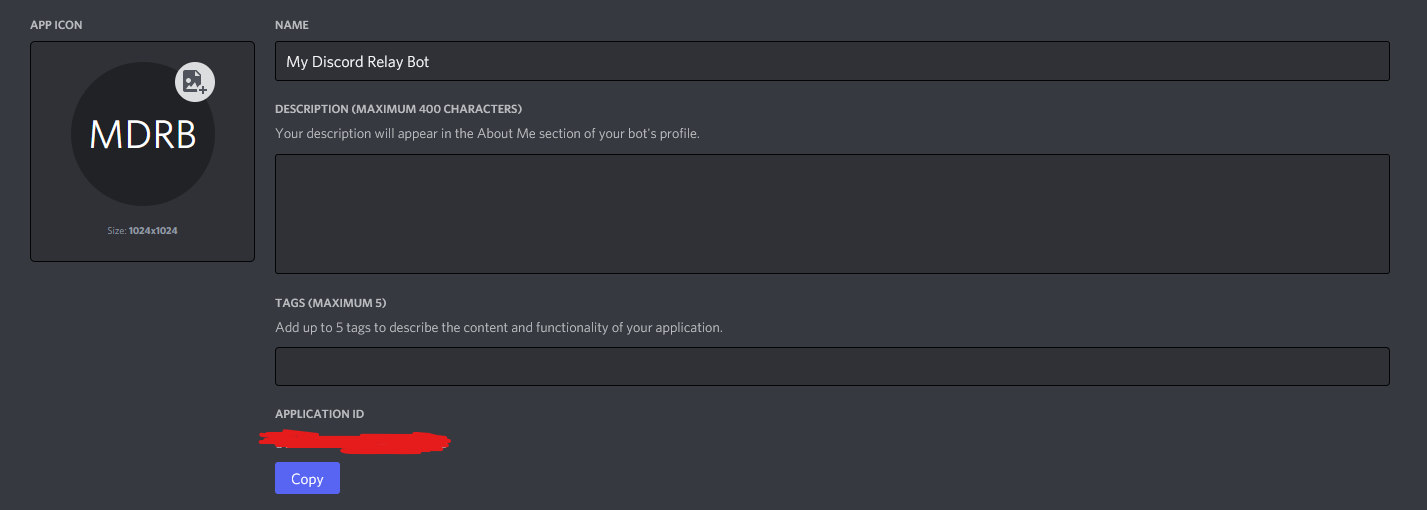
Once you created your app, you will be taken to a General Information Page. Here you can give your app a description, change the icon of the app and create a bot. You can skip this page and click on Bot on the left-hand menu
#
Part 2 - Creating the Bot
We are now ready to create the "Bot" and get the "token" needed by the mod. On the left hand menu, click Bot and you will be taken to the create bot page.
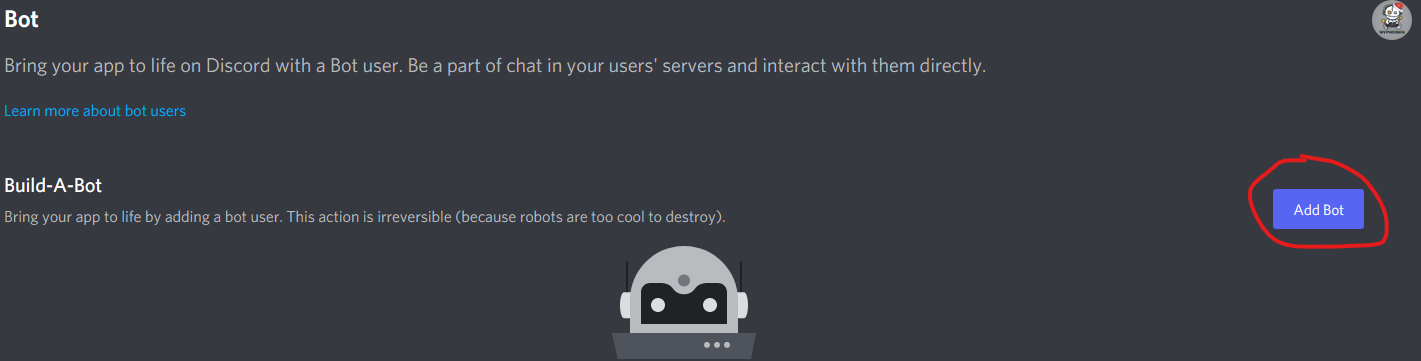
Add Bot and you will be prompted if you are sure you want to "Add a bot to this app". Click "Yes, Do it!" to create the bot.
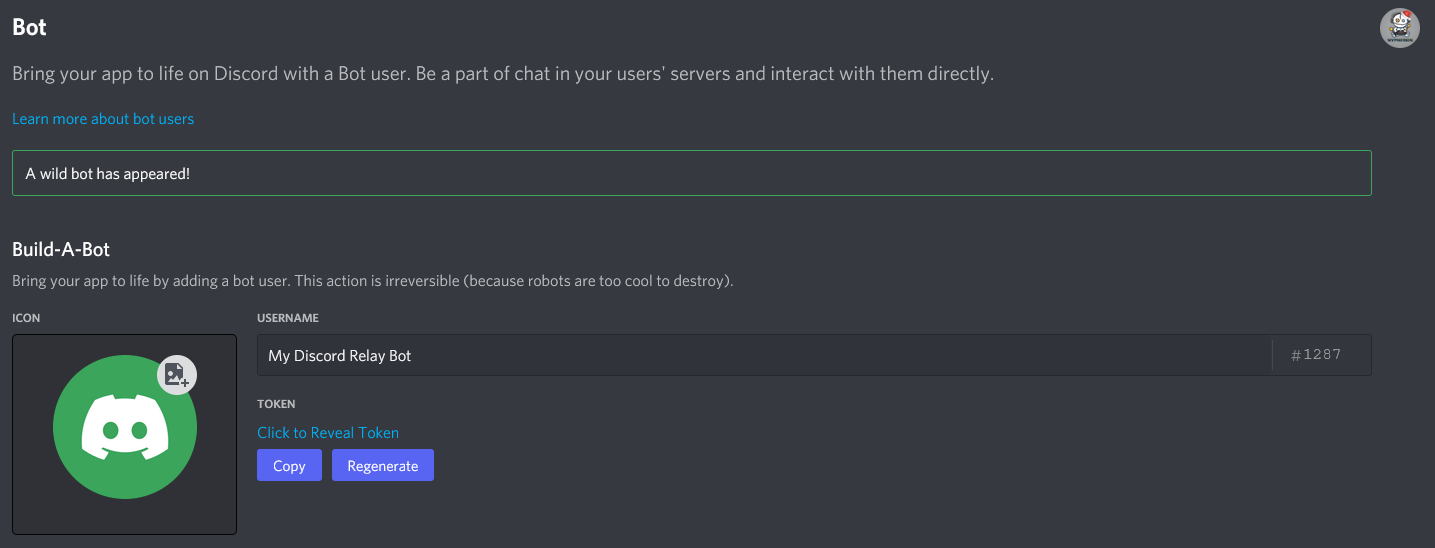
KEEP THIS TOKEN PRIVATE AT ALL TIMES! If someone gets hold of this token, they can run another bot, acting as yours
#
Part 3 - Bot Permissions and Inviting the bot
DO NOT SKIP THE STEP BELOW
If you do, your bot will fail to start!
On the same page where you found the Bot Token, scroll down until you see Privileged Gateway Intents. Enable all 3 of them
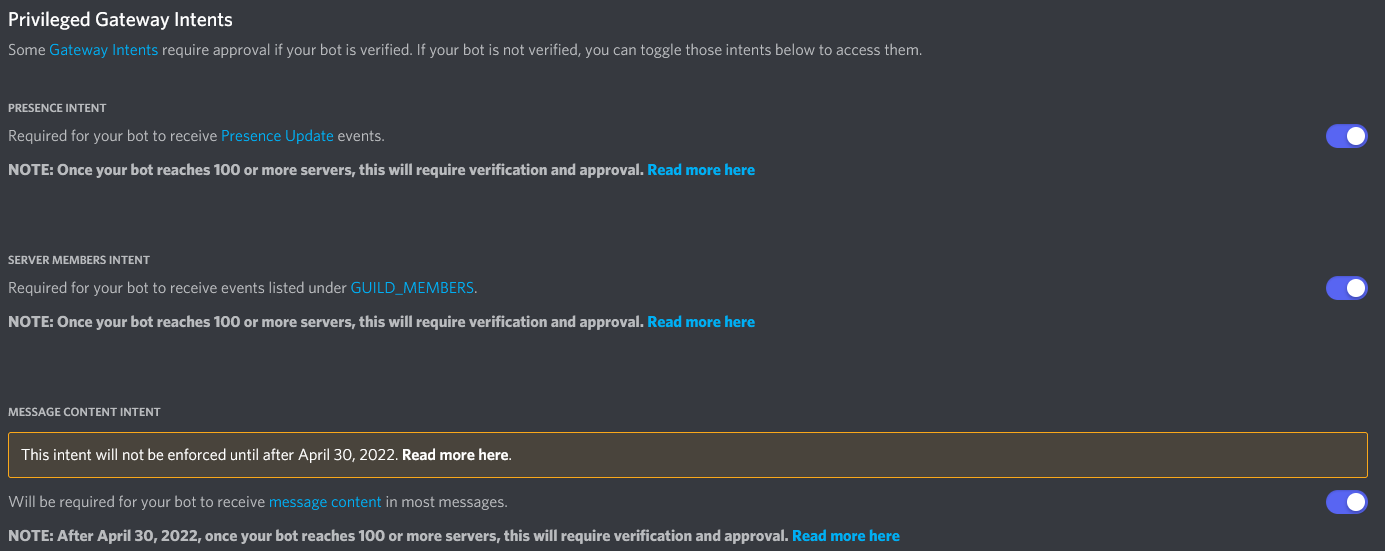
GUILD_MEMBERS and MESSAGE_CONTENT intents as well. Without this, the bot will not start
Since Version 1.4, the bot automatically generates an invite link with the required permissions. Keep an eye on your log for a message like this
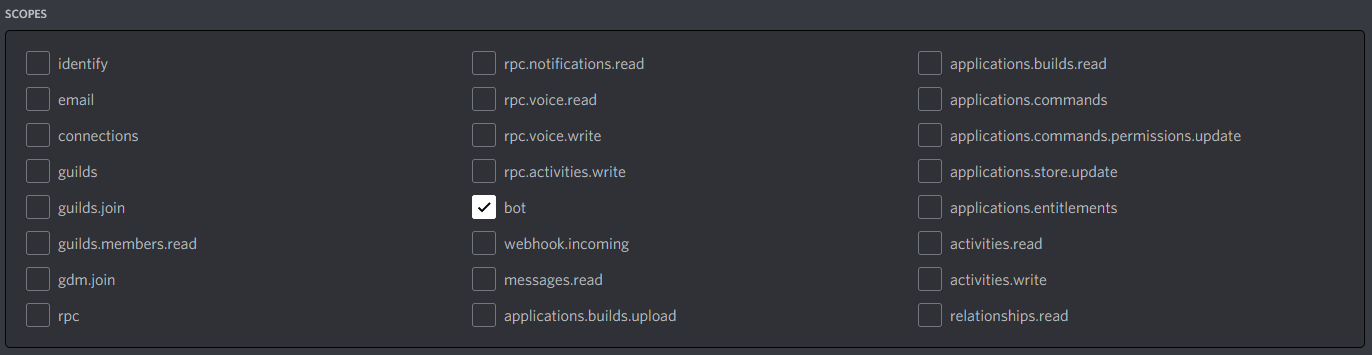
[Simple Discord Link/]: Discord Invite Link for Bot: https://discord.com/api/oauth2/authorize?client_id=xxxxxxxxxxxxxxxxx&permissions=738543616&scope=botThe final step now is to invite the bot to your server. To do this, head over to the "OAuth2" -> URL Generator tab on the left-hand menu. This will allow you to generate an invite link to invite the bot to your server.
Under the "Scope" section, click "bot" and scroll down to "BOT PERMISSIONS". Under that, choose the following permissions.
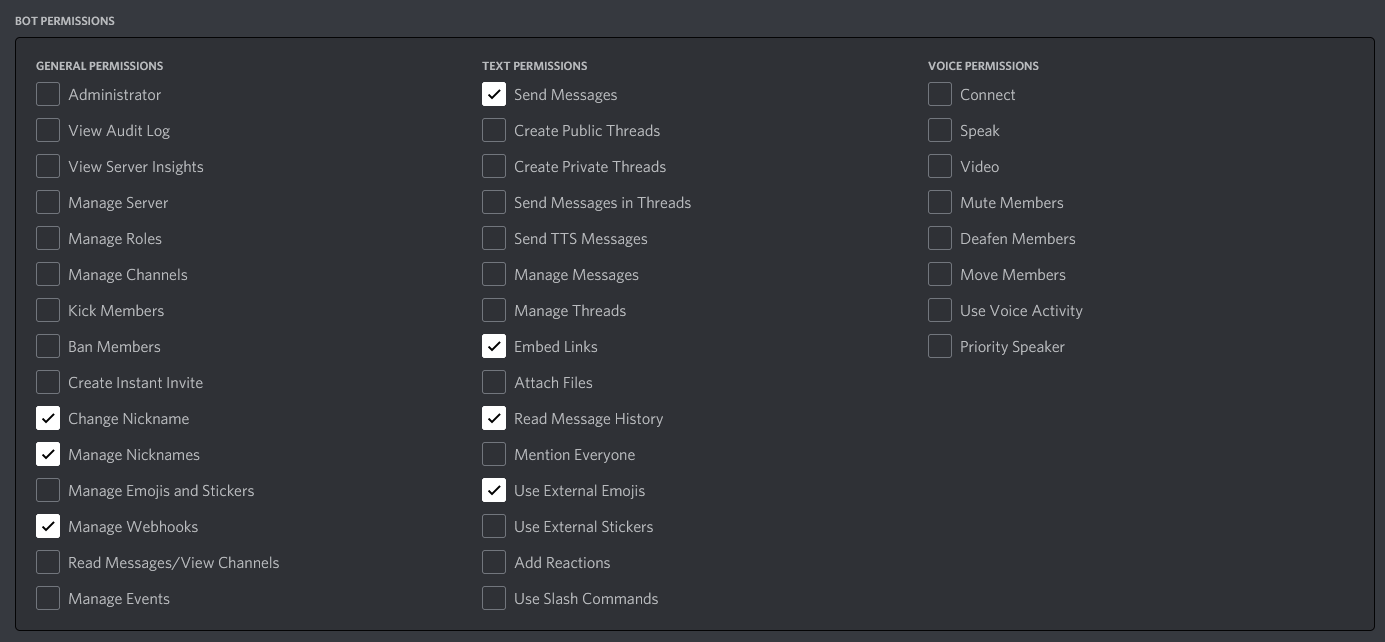

If you have invited the bot before (version 1.0), then simple visit the new url in your browser to update the bot permissions. YOU DO NOT NEED TO KICK THE BOT FOR THIS!